First,, Apologize for bad English and anything on this site. ^_^
INTRODUCTION
INTRODUCTION
CAJON HISTORY
Cajon (read "cahone") (Spanish pronunciation: "kaxon") is derived from the Spanish for crate, drawer, or box. One theory about Cajon began in the 18th century when the African slaves brought to the colonies of Spain in Peru. The slaves, forbidden to play their
traditional instruments. Because of that, they make a box shaped instrument that can be occupied so as bench so that they can disguise the instrument. Cajon was developed in the 19th century, and in 1850 was the peak of its popularity. And now, cajon also worldwide as one of the musical instruments are very much playable. One of them as an acoustic instrument accompaniment.
DEMO GASENDRA'S CAJON
PROCESS TO MAKE CAJON
1. Of course, before we making this cajon, prepare all materials and tools required such as boards, plywood, nails, glue, bolts, stringed, hammer, cutting tools (saws), sandpaper, and everything that can be used to make a Cajon.
* In this case, I'm using the multiplex (teak wood) with a thickness of 12 mm and a membrane / tapa / drumhead using plywood with a thickness of 3 mm.
2. Sketch on board, (according to the desired size) lines to be cut. On the internet there are various sizes that are used in the making of this cajon. For high ranging between 40-60 cm and the length and width ranging from 28-38 cm.
* Holes / soundhole usually are dealing / parallel with tapa / headdrum. But it could also be in the side.
* There is some variation in the shape and size of the holes / soundhole. But generally rounded with sizes ranging from approximately 30-70% width cajon.
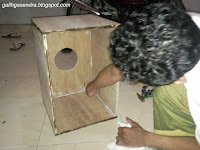
* In this case, the size of which used to be seen as an image.
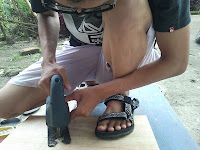
3. Cut these sketches into parts with saws or other cutting tools.
* For making holes (soundhole) use drill first and then use a sticks saw.
* Cut properly so that when installed, there is no gap or slit on each patch.
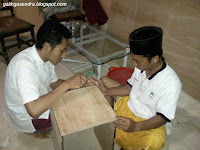
4. In the installation process, use wood glue on the parts that will be affixed to better glue and closing the gap / slit / pores undesirable. Then use a nail plywood to reinforce the patch.
*Ask for help a friend or use the gripper tool to facilitate the installation process.
*In this case my cousin ask for help. [:)]
*In this case my cousin ask for help. [:)]
5. To reduce the gap, use glue on each corner and on each of the parts are affixed.
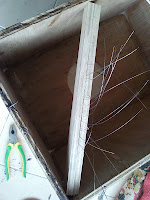
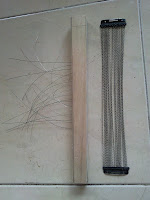
6. In order for the resulting sound better, use a snare or a string can also be added bells.
*Snappy Modification:
*There are various ways snare or string mounting on cajon. For example:
"APOLOGIZE IF THERE'S ANYTHING WRONG"
Book:
● http://caseyconnor.org/jl/cajon
● http://www.wikihow.com/Build-a-Cajon
● http://en.wikipedia.org/wiki/Cajón
● https://www.google.co.id/imghp?hl=id&tab=w








Nice work
ReplyDeleteThanks so much for sharing! Lots of thanks for this post.I think it is a very good post. It helps us many away. So many many thanks for this article. beginners guiter
ReplyDeleteThis comment has been removed by the author.
ReplyDeleteYour Demo Gasendra’s Cajon (Handmade Video Sound) is an amazing sound. The best process provides a make Cajon. I just was watching you provide a video online about Cajon and thought it would be a fun fast and simple project.
ReplyDeleteThe feeling of being part of the action in a cinema hall, and being able to listen to the lecturer speak right in front of the lecture hall would not have been possible without acoustical materials. Acoustics Cyprus
ReplyDeleteHeavenly Smoking Drumskins! Would those folks be able to play. The manner in which they played their drum music, so close, all arranged with signs and drum design reports generally worked in contrastingly to every tune. twitch follower buy
ReplyDeleteAppreciate you sharing great blog article. Thanks Again. Cool. adult piano lesson singapore
ReplyDelete