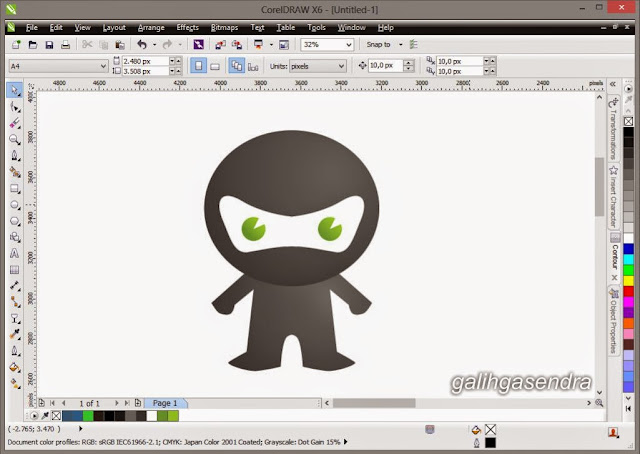
Create an ellipse (F7) for the head.
Step 2
Use Pen tool to draw closed curve like shown below.
Step 3
Copy-Paste the object and Mirror horizontally (Horixontal flip) the copied then Weld both.
Step 4
Select the both object and press C for Align Center Vertically.
Step 5
Create a circle (Ellipse tool - F7) and a triangle (Pen tool) like shown below. Then use Back minus front to make the eye.
Step 6
Copy the eye then arrange it like shown below. Group (Ctrl + G) both of the eyes. After that, select the grouped eyes and the head, then press C for Align Center Vertically.
Step 7
Use Pen tool to create a hand like shown below.
Step 8
Copy-Paste then Mirror horizontally the hand. Similar like Step 6, group (Ctrl + G) both of hands. Select grouped hand and head, then pres C.
Step 9
Use Pen tool to make the body and leg.
Step 10
Similar Step 8, Copy-Paste then Mirror horizontally the body-leg. Similar like Step 6, group (Ctrl + G) both of legs. Select grouped body-legs and head, then pres C.
Step 11
Select grouped hands and grouped body-legs. Then Weld them.
Step 12
Select the body, then pres Shift + PgDn to order the body to back of layer.
Step 13
Coloring the head. Use Fountain Fill to make it little 3D look.
Step 14
Coloring the eyes.
Step 15
Use Attributes Eyedropper to copy each color similar used.
Step 16
Use Pen tool to create a curve like shown below.
Step 17
The fill the area with Smart Fill Tool.
Step 18
Increase little size (105% like shown below).
Step 19
Copy-Paste then Mirror horizontally or repeat the step 18 for next hand.
Step 20
Repeat the step 16-19 for the leg.
Step 21
Use Attributes Eyedropper to coloring them.
Step 22
For the body shadows, use Pen tool to create curve object like shown below.
Step 23
Select the curve and the body then use Intersect to create curve from the overlap area. Coloring it with black.
Step 24
Select the shadow. then use Transparency tool.
Step 25
Select tranparency type to Uniform then setting the opacity.
Step 26
Repeat step 23-26 to make shadows in other side.
Step 27
For the bracelet/ band, use step 16-17 with line then Smart fill. Coloring with black, and use Transparency tool.
Step 28
For the head shadow, create an ellipse like shown below like previous step, Smart Fill, coloring with black, then use Transparency tool.
Step 29
Use same way for the bracelet shadows.
THE SWORD
Step 30
Create a rectangle like below. Adjust the Corner radius to make the corner rounded.
Step 31
Create another rectangle with rounded corner like below.
Step 32
For the handle, create copied rectangles like below.
Step 33
Coloring the sword and group them.
Step 34
Rotate the sword, copy it, then Mirror horizontally.
Step 35
Bring the swords to back of layers (Shift+PgDn)
Step 36
For the shadows, create an elipse like below.
Step 37
Use Drop shadow tool.
Step 38
Break shadow group appart with Ctrl+K and bring it to back of layers (Shift+PgDn). You are done!
Hope this tutorial helpfully and thanks for visit.


i love this blog really you sharing good stuffCorelDraw Graphics Suite 2017 i love this your site always i want to visit your site
ReplyDelete